Atalanta: Refitting a Modern Classic - Part 2 of 3
When we left off, we had accomplished a variety of big jobs as part of Atalanta’s major refit. Now, it was time to remove the mast from the boat for paint and service. Read on!

Prepping the mast: 9” bulkheads require long bolts
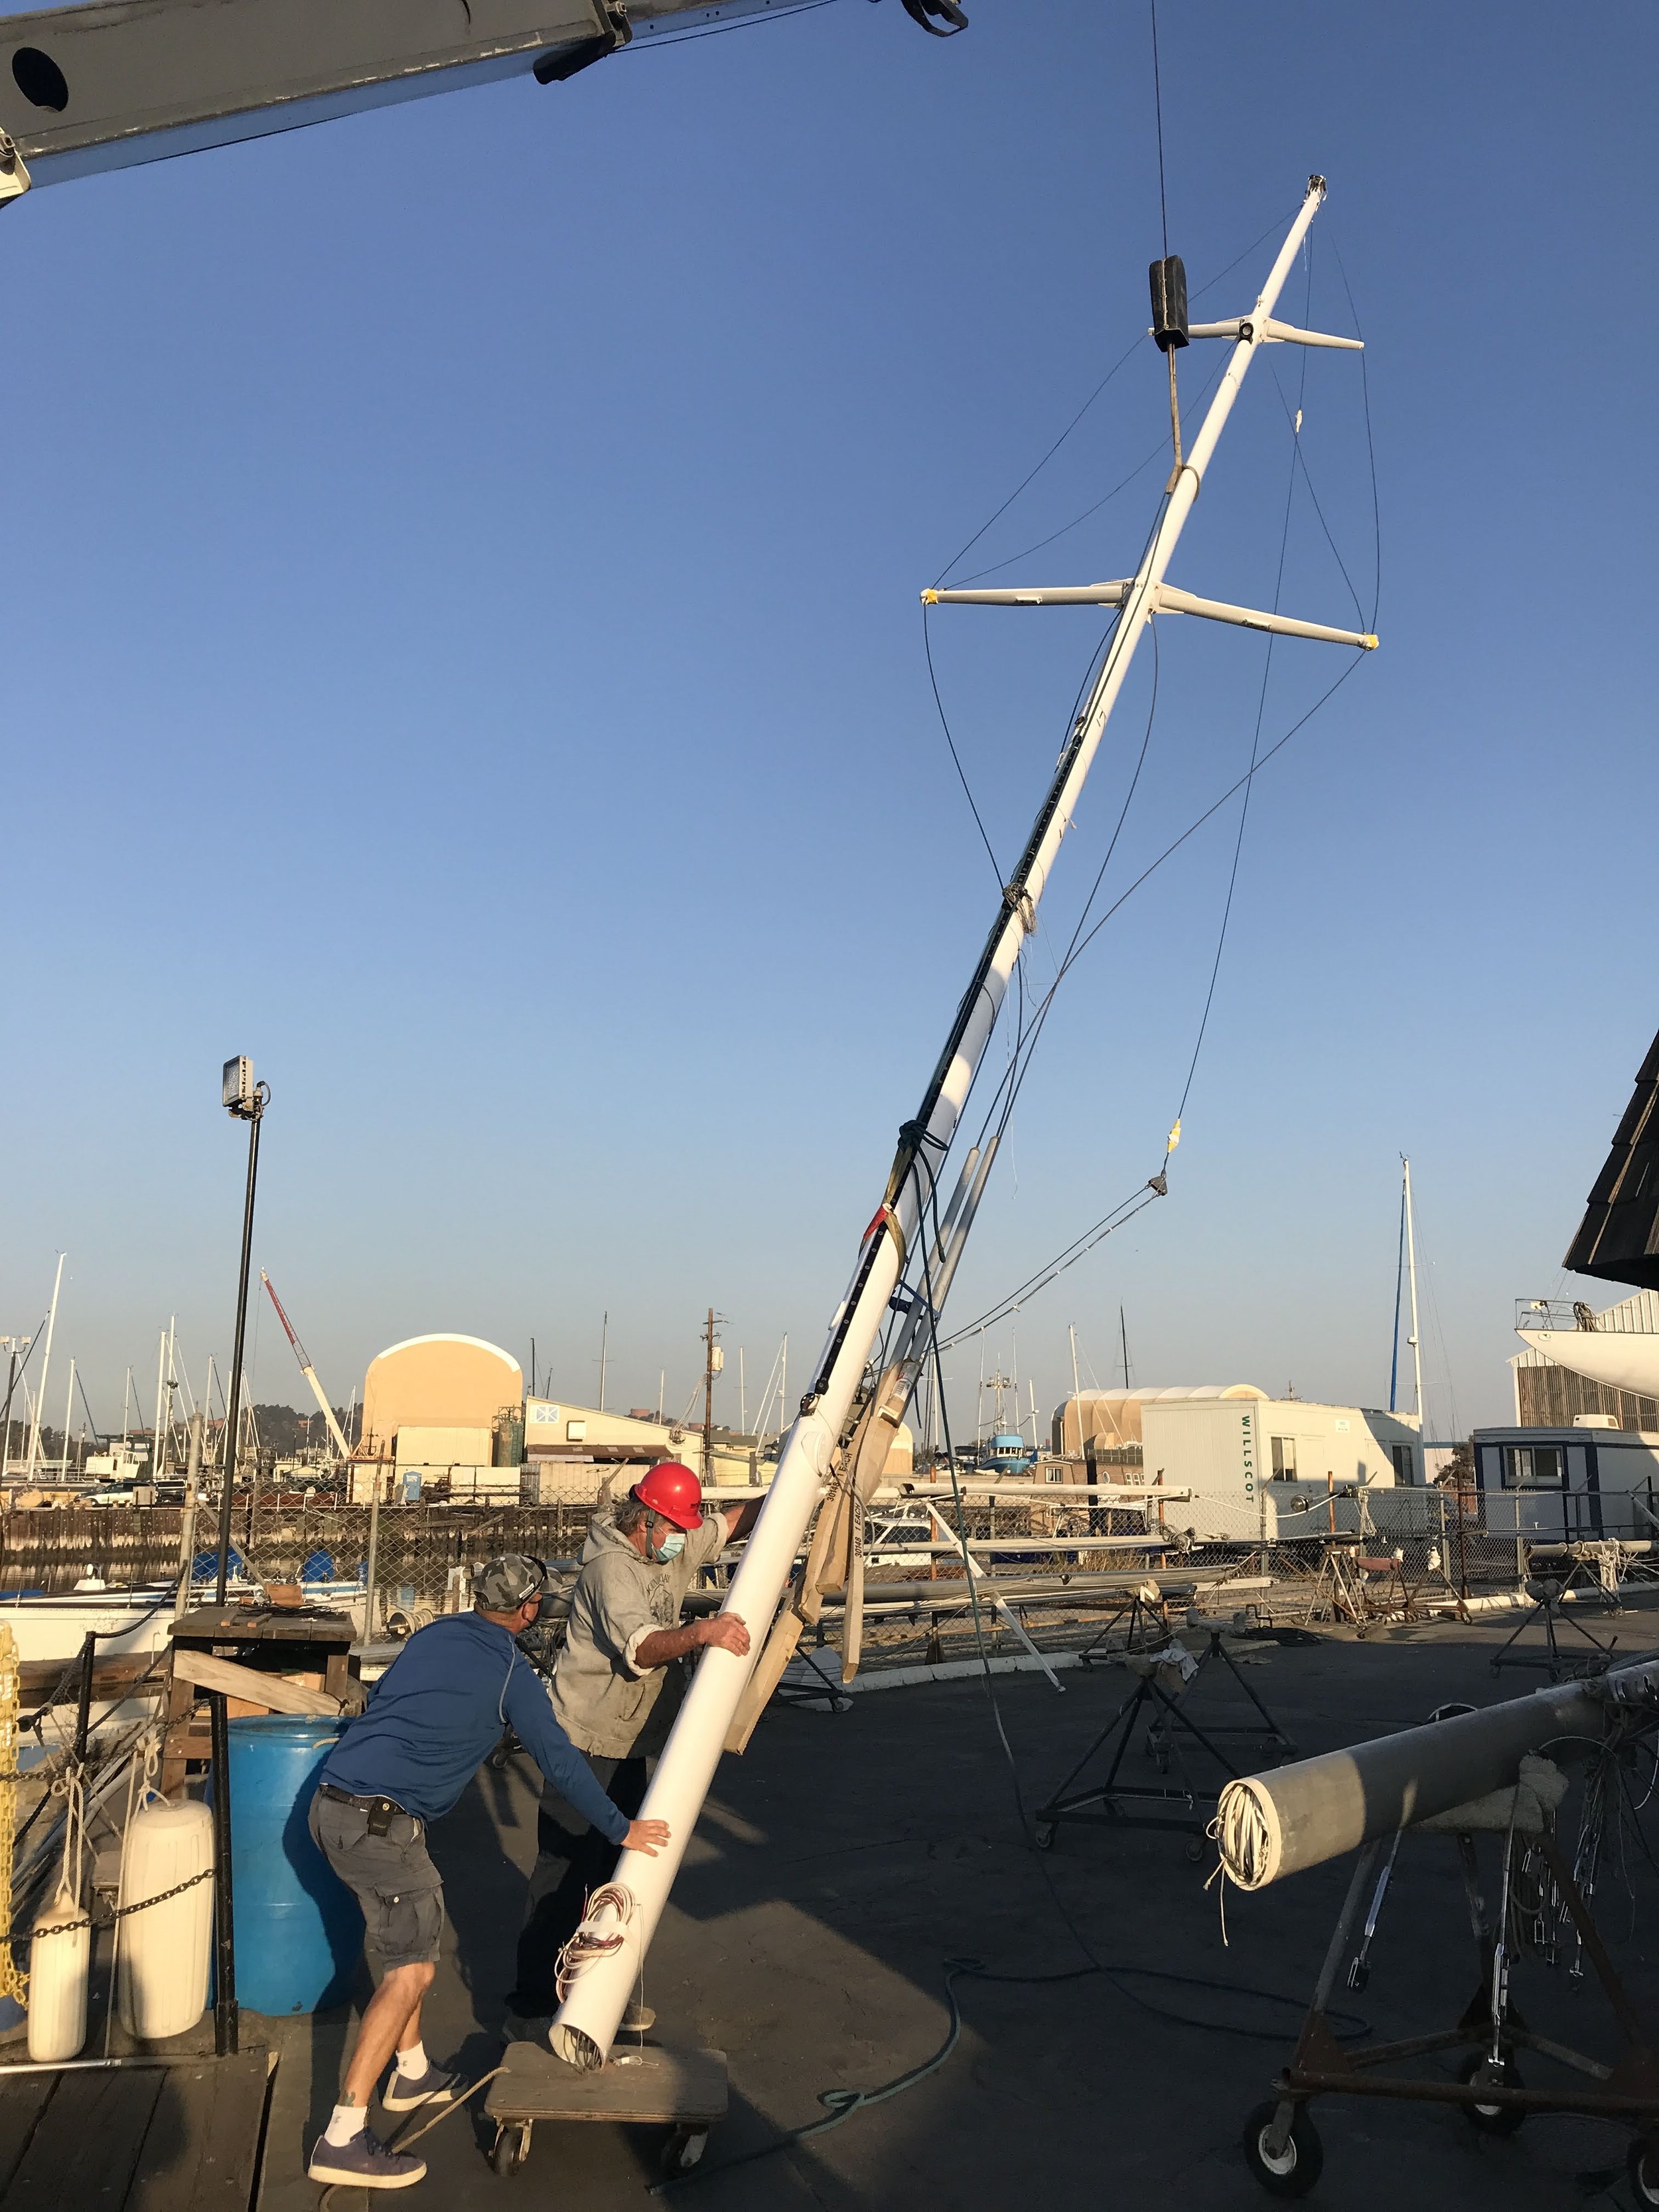
Gilles and the team at Svendsen’s Bay Marine made quick work of removing the 75’ tall mast
When we started lifting the mast out, it nearly overloaded the 1,500lb crane, weighing in without the boom at a healthy 1,470lbs. Fortunately, the crew was very experienced and the exercise went off without a hitch. Svendsen’s Bay Marine then blasted off all the paint and filler and we were glad we did because it exposed some small cracks in the aluminum, especially around the gooseneck (where the boom attaches to the mast), which needed to be addressed.
Before putting the mast back in, Gilles replaced the spinnaker pole track that runs up the lower section of the mast with a new Harken system. We saved money by refurbishing the original aluminum spinnaker pole and reaching strut rather than replacing them. After welding the gooseneck, the yard sprayed on fresh paint, the rod rigging was thoroughly inspected, and we were back in business. Having the rig swinging in the air was nerve-wracking, but Gilles and the Svendsen’s crew did a very professional and confidence-inspiring job.

Chainplates out for inspection and service

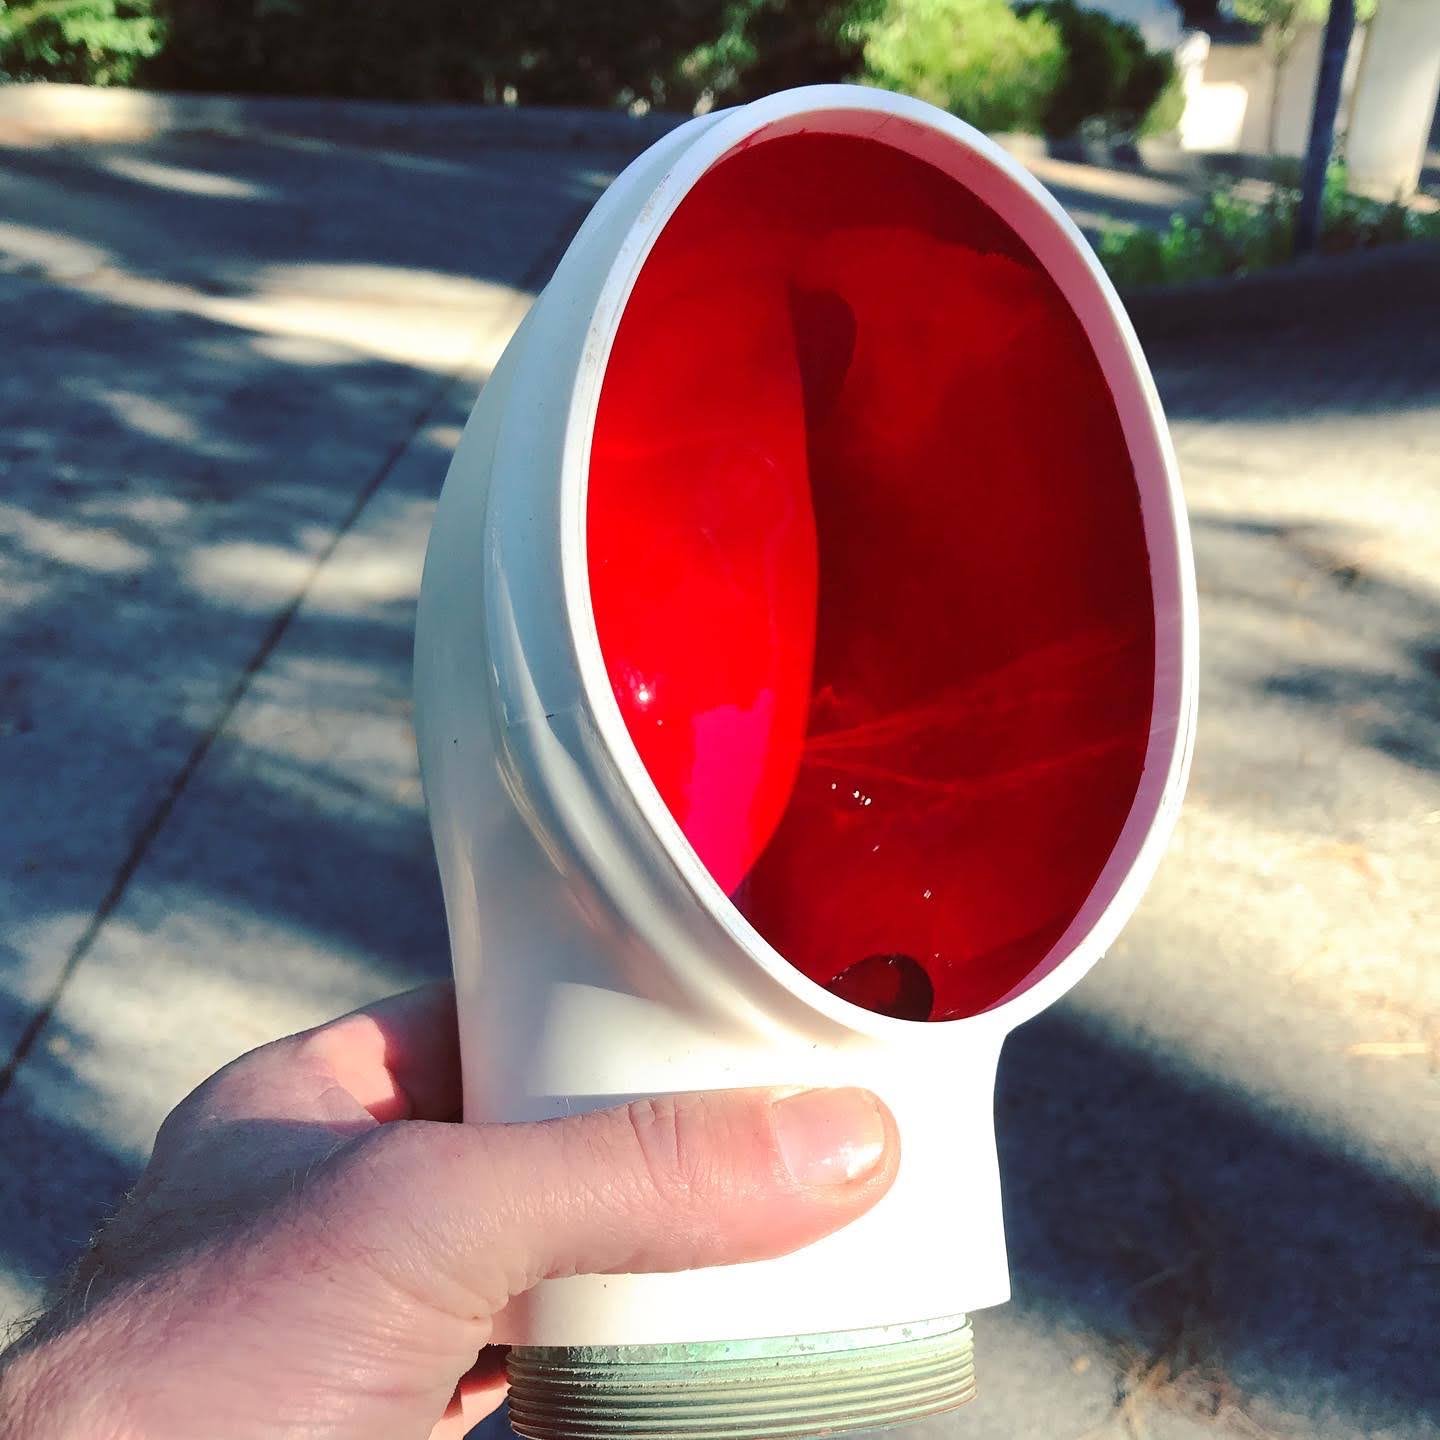
Cracks in the aluminum concealed by filler
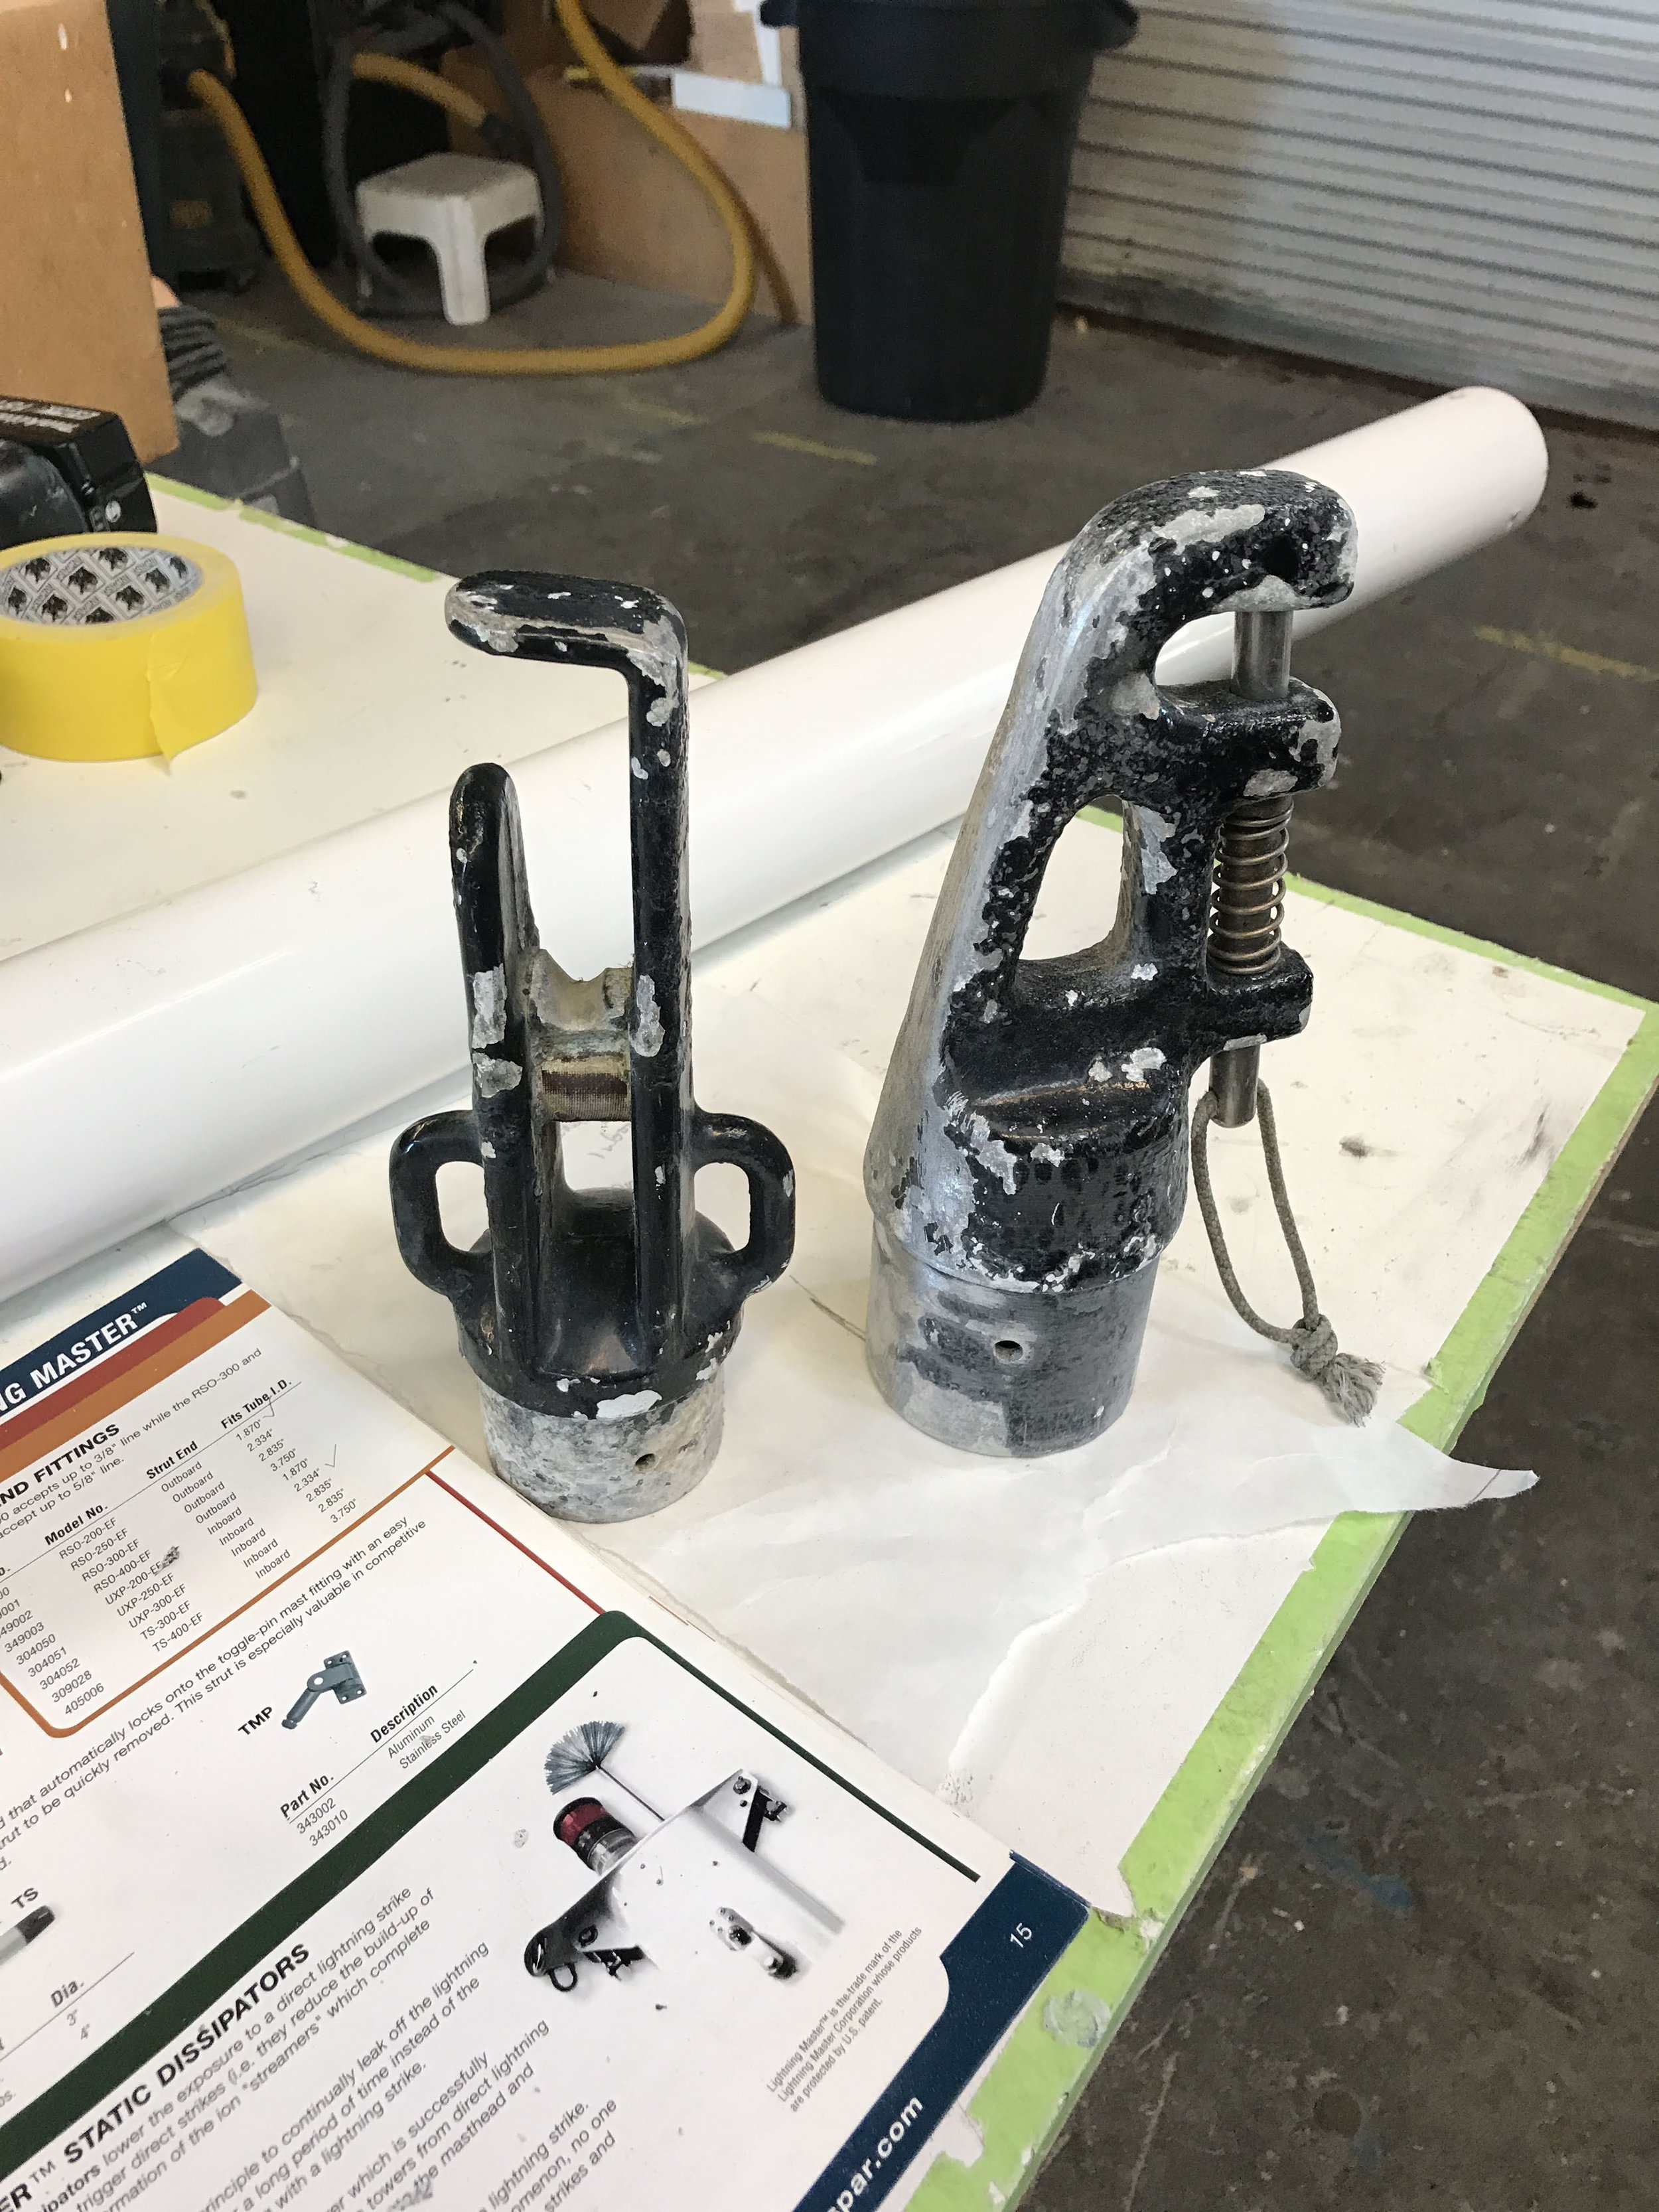
Reaching strut fittings being resurrected

Fresh paint on the aluminum spreaders
The next several projects happened concurrently. We commissioned The Canvas Works in Sausalito to design and fit a new offshore dodger (like an awning) for the center cockpit with an eye toward charter guest comfort. The new dodger, which replaces a spray hood (mini-awning) that can be reinstalled when the boat is in racing configuration, is extremely stable and provides 360-degree views while protecting nearly the entire cockpit. The Canvas Works also made some cockpit cushions, which snap in place and have served us well for charters.

The dodger must provide 360 degree visibility and full coverage of the center cockpit

Aft cockpit cushions for comfort
The cabin windows were due for replacement and this turned out to be a major job for Gilles and his team as some of the wood around the frames was rotten and needed repair. The end result, though, was both beautiful and functional new windows and varnished interior frames.
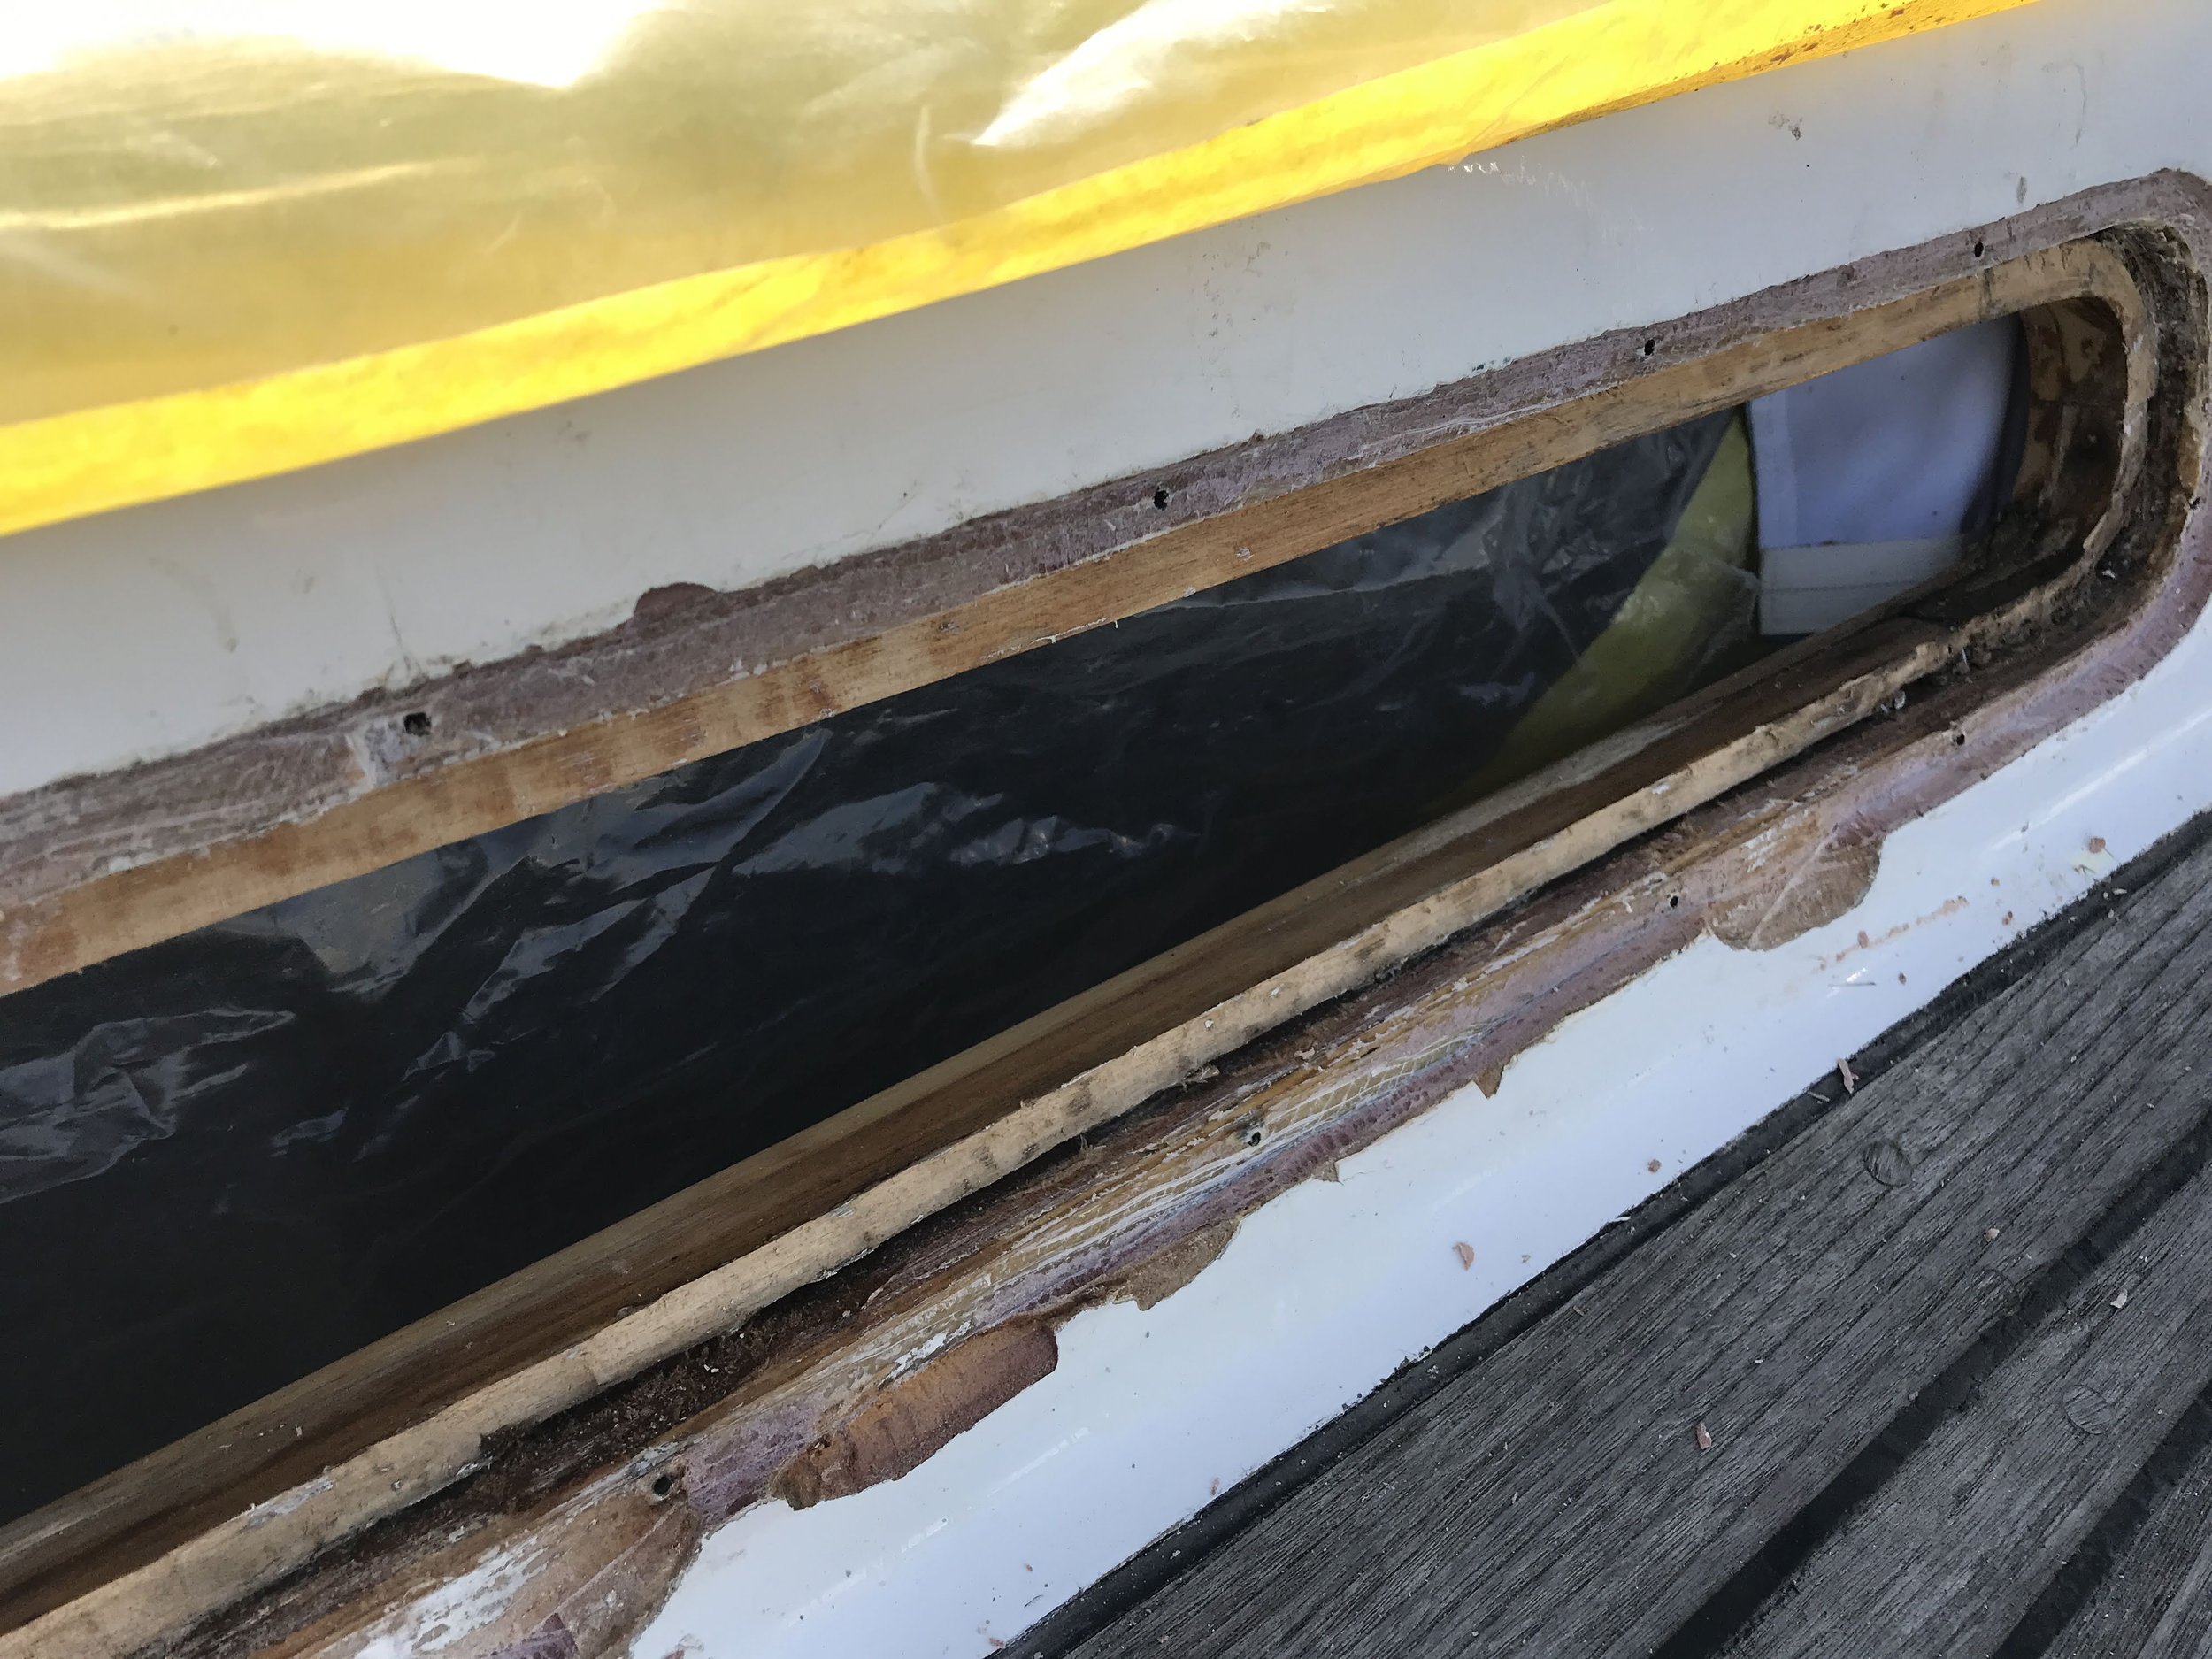
Before: what you don’t want to find behind your windows
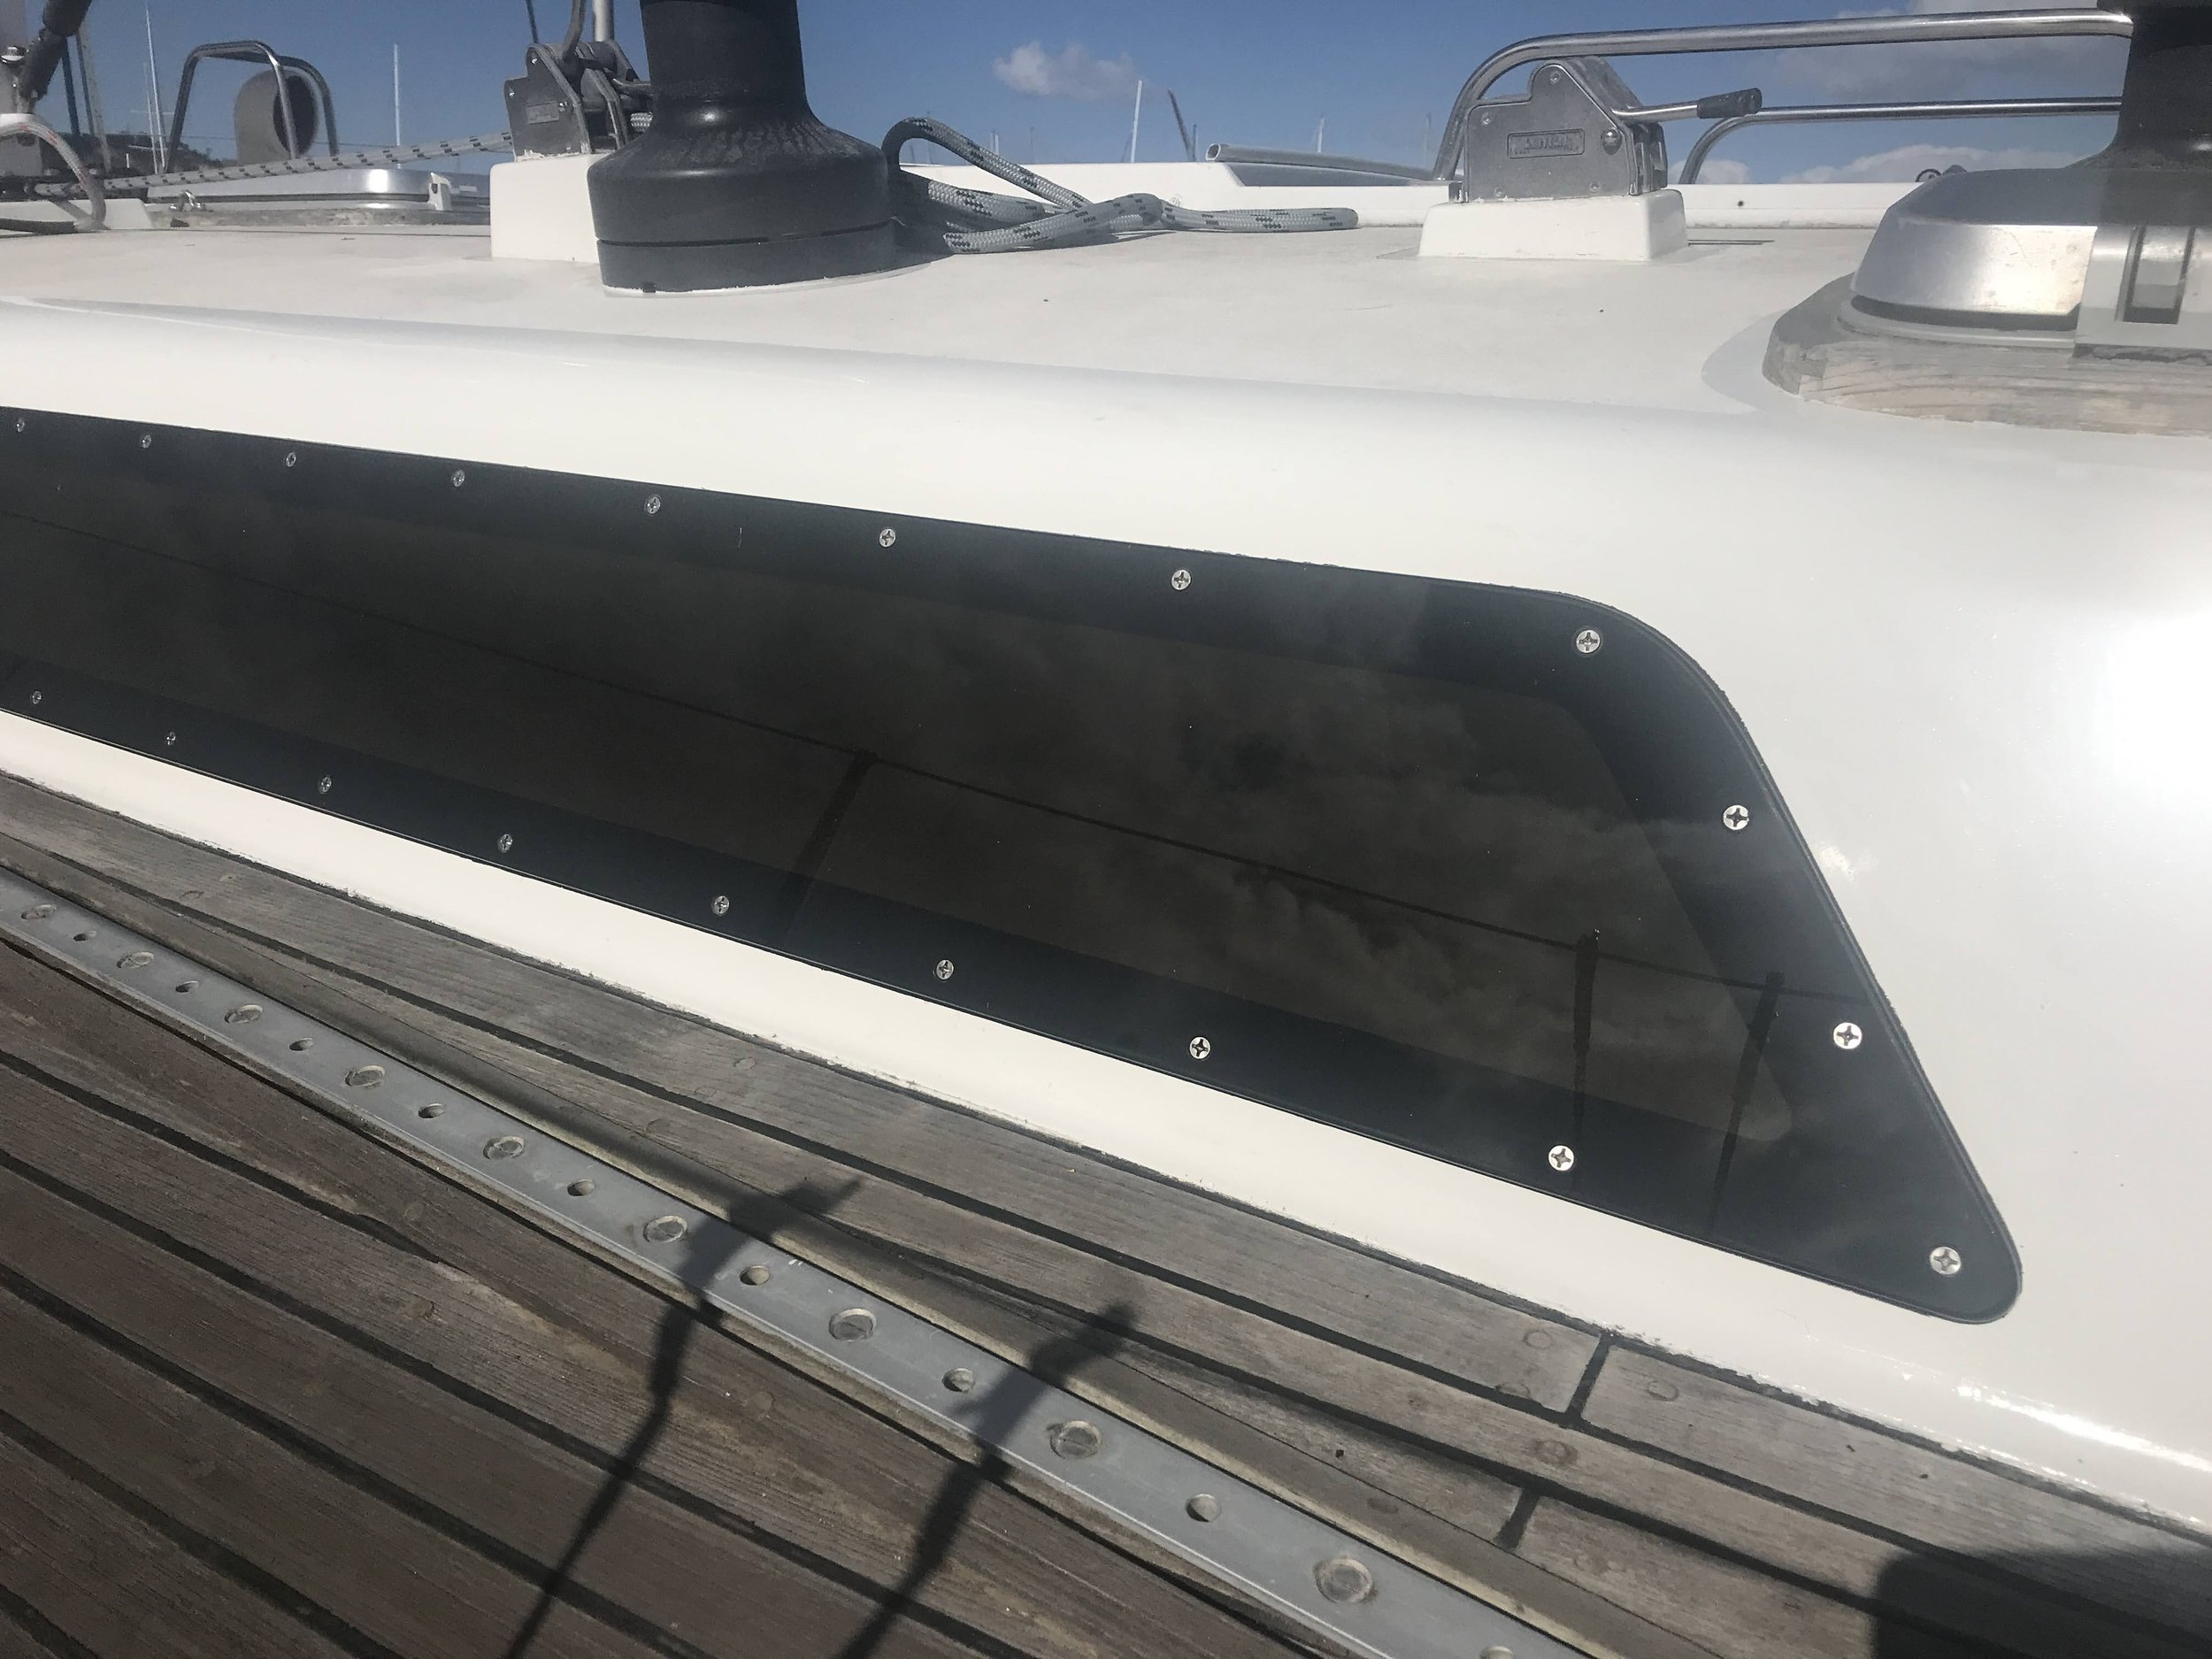
After: beautifully finished
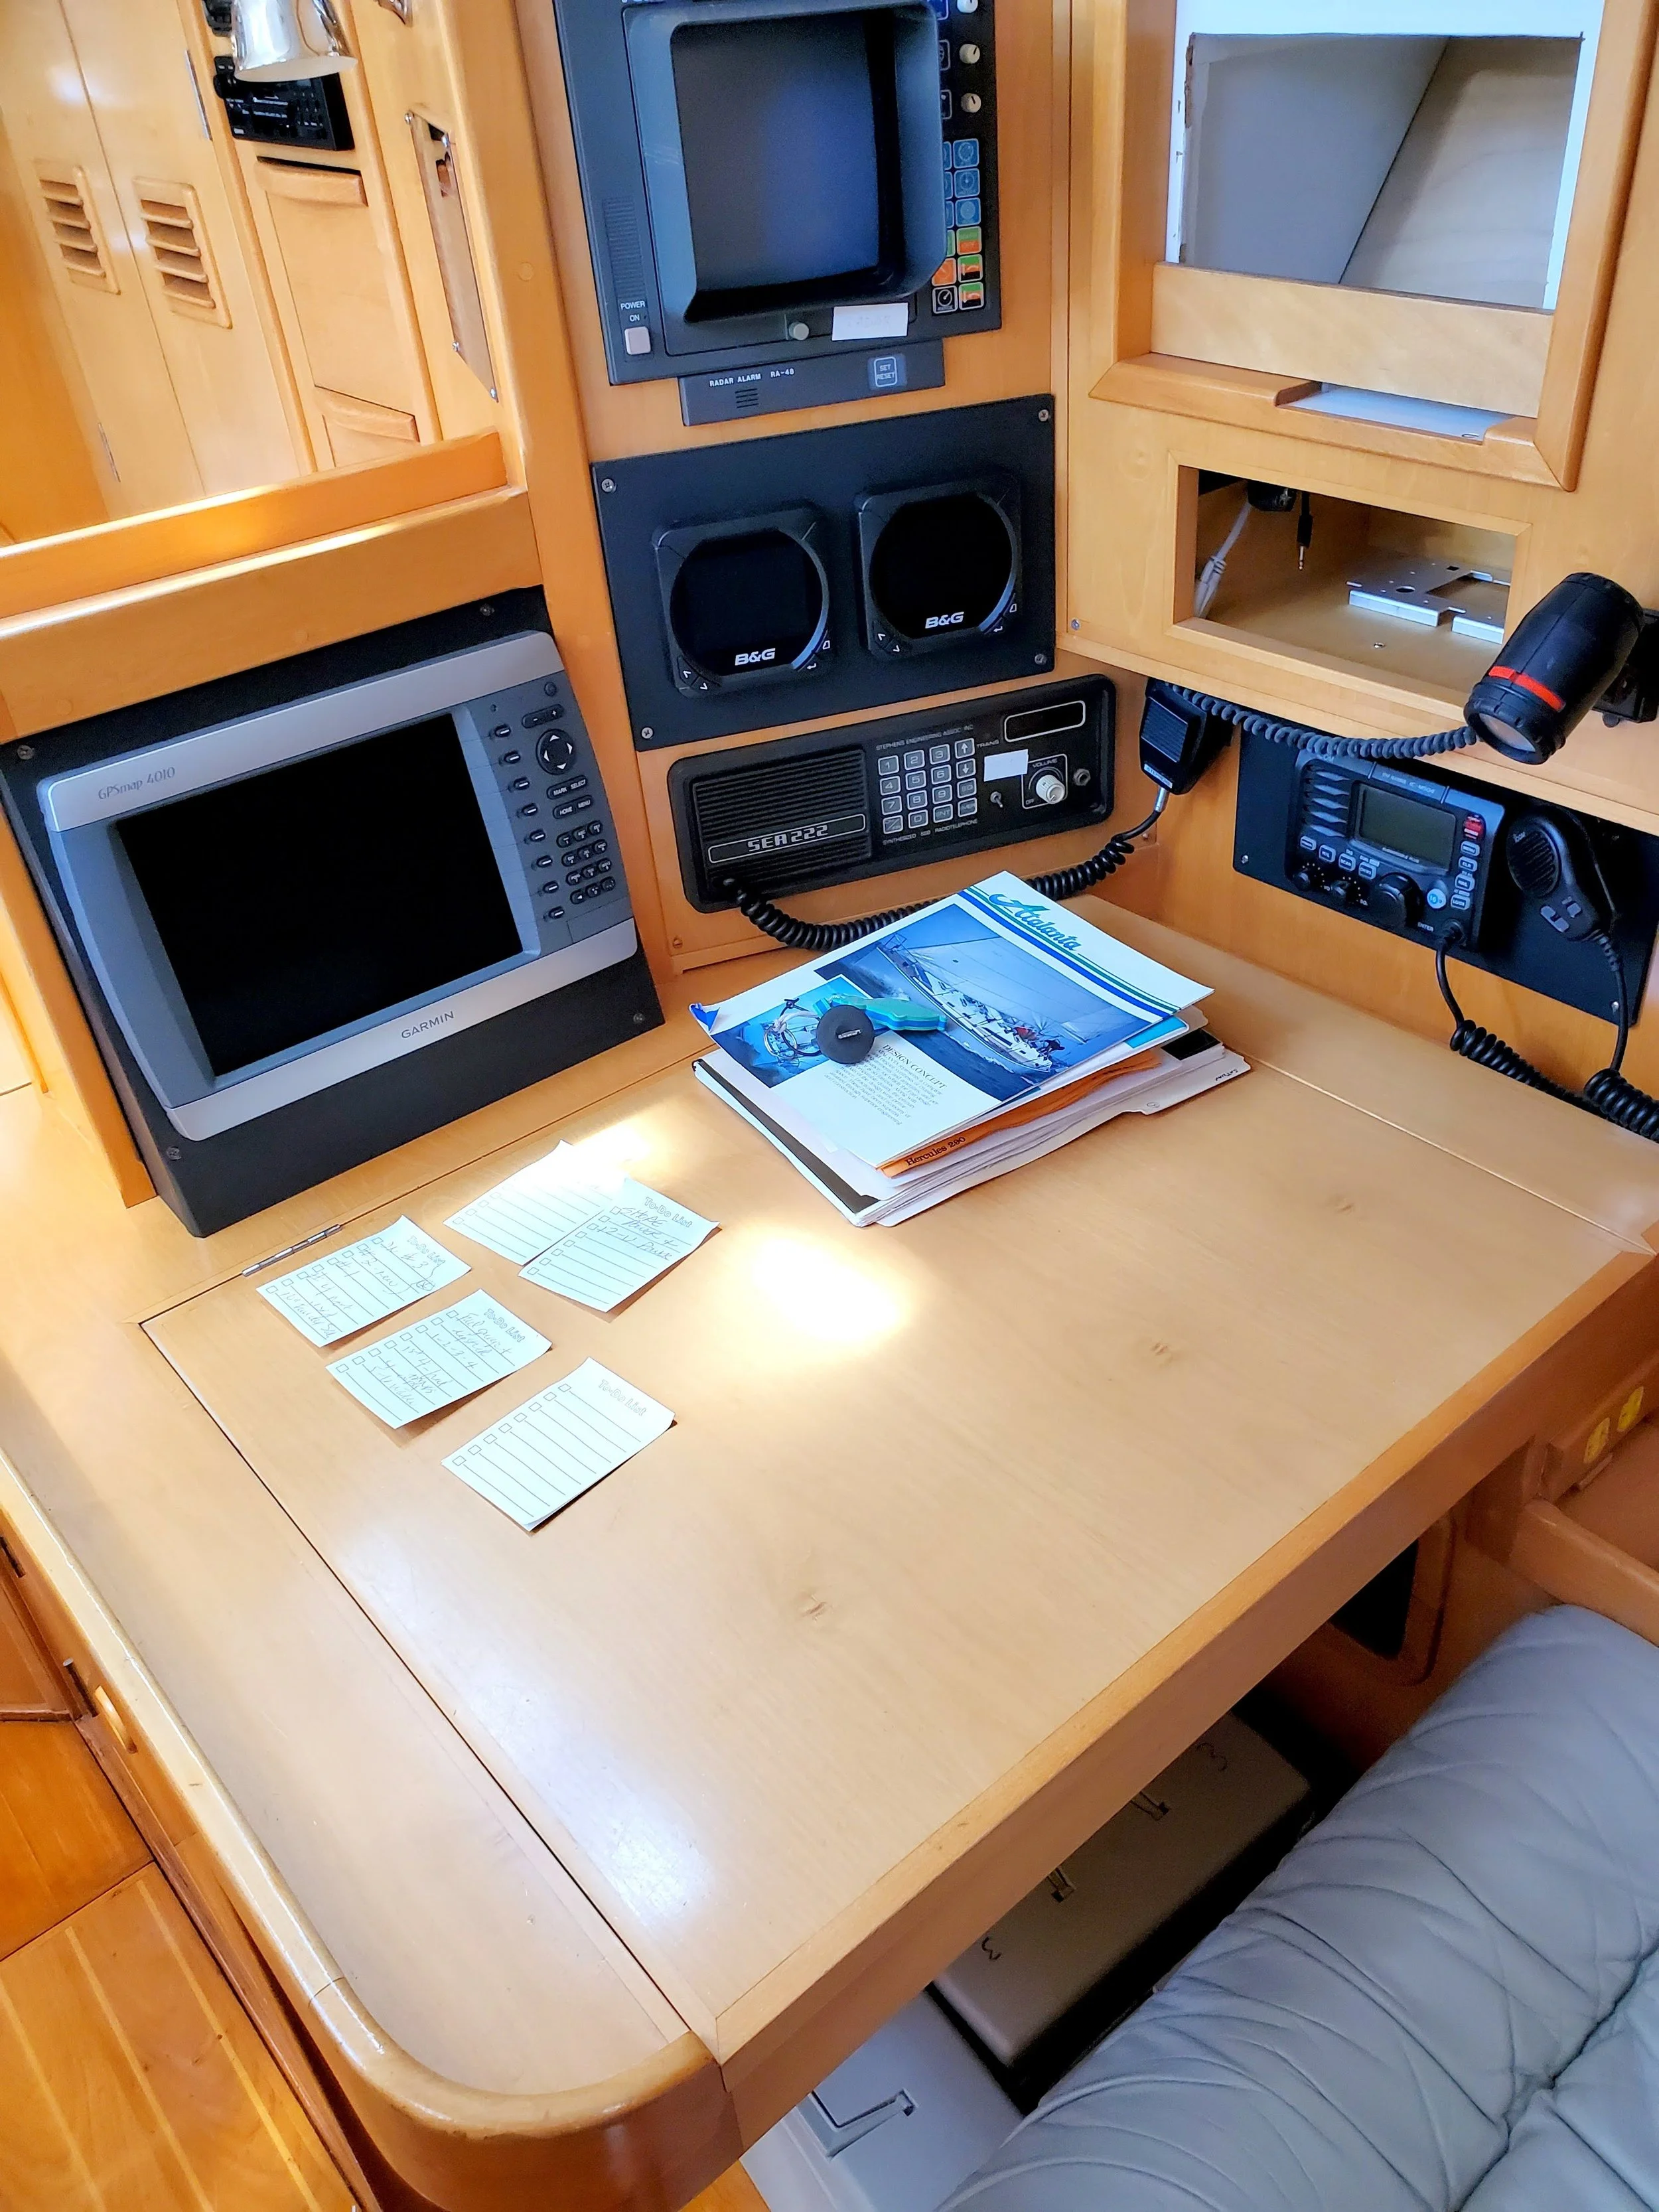
Chuck and I decided that rather than stagger the replacement of the electronics, we would just do them all at once. Eric Steinberg at Farallon Marine Electronics in San Rafael managed this aspect of the refit, walking us through the process of installing an NMEA network that incorporated the existing B&G T41 color instrument displays and adding two Zeus multi-function displays at the nav table and the helm. This also meant fitting a new Furuno radar, chart plotter, Fusion Link stereo, AIS (a signal that helps ships identify each other), Icom high frequency radio transceiver and auto pilot computer. All told, this represented a not insignificant portion of the overall expense of the refit.
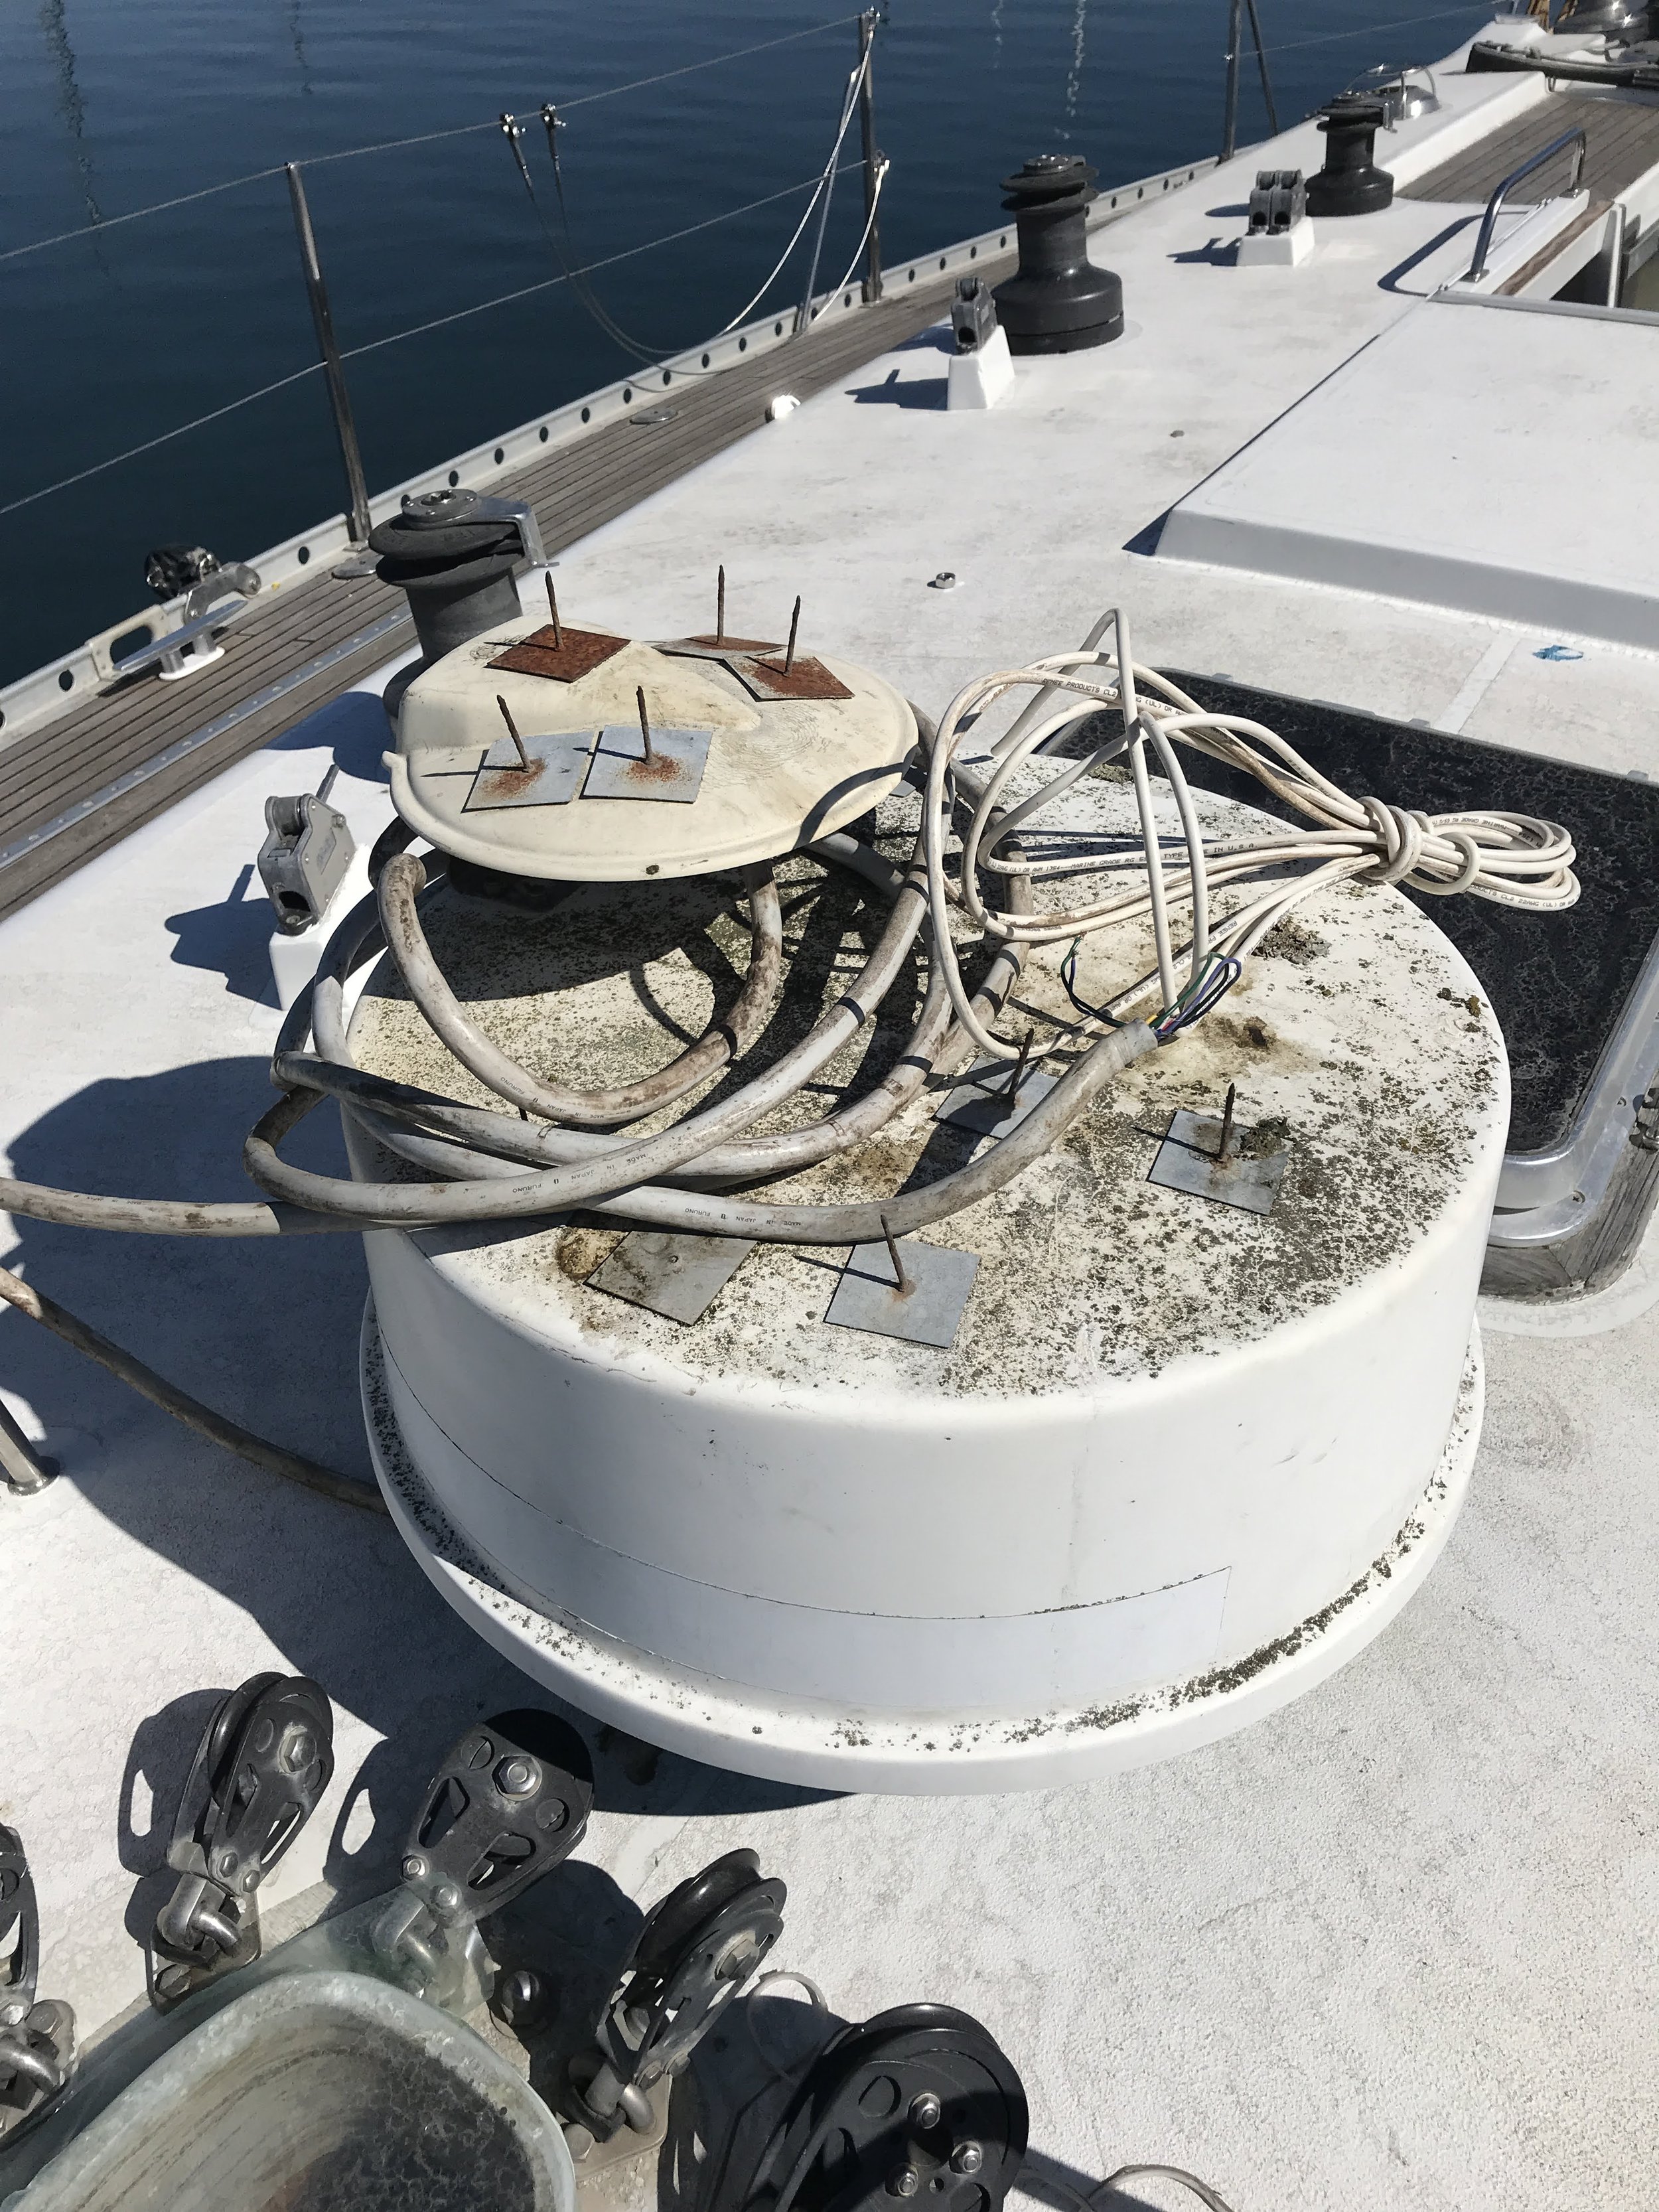
We donated the OEM electronics from the 1980s to local commercial fishermen
Before: a mix of electronics from the 80s through the early 10s
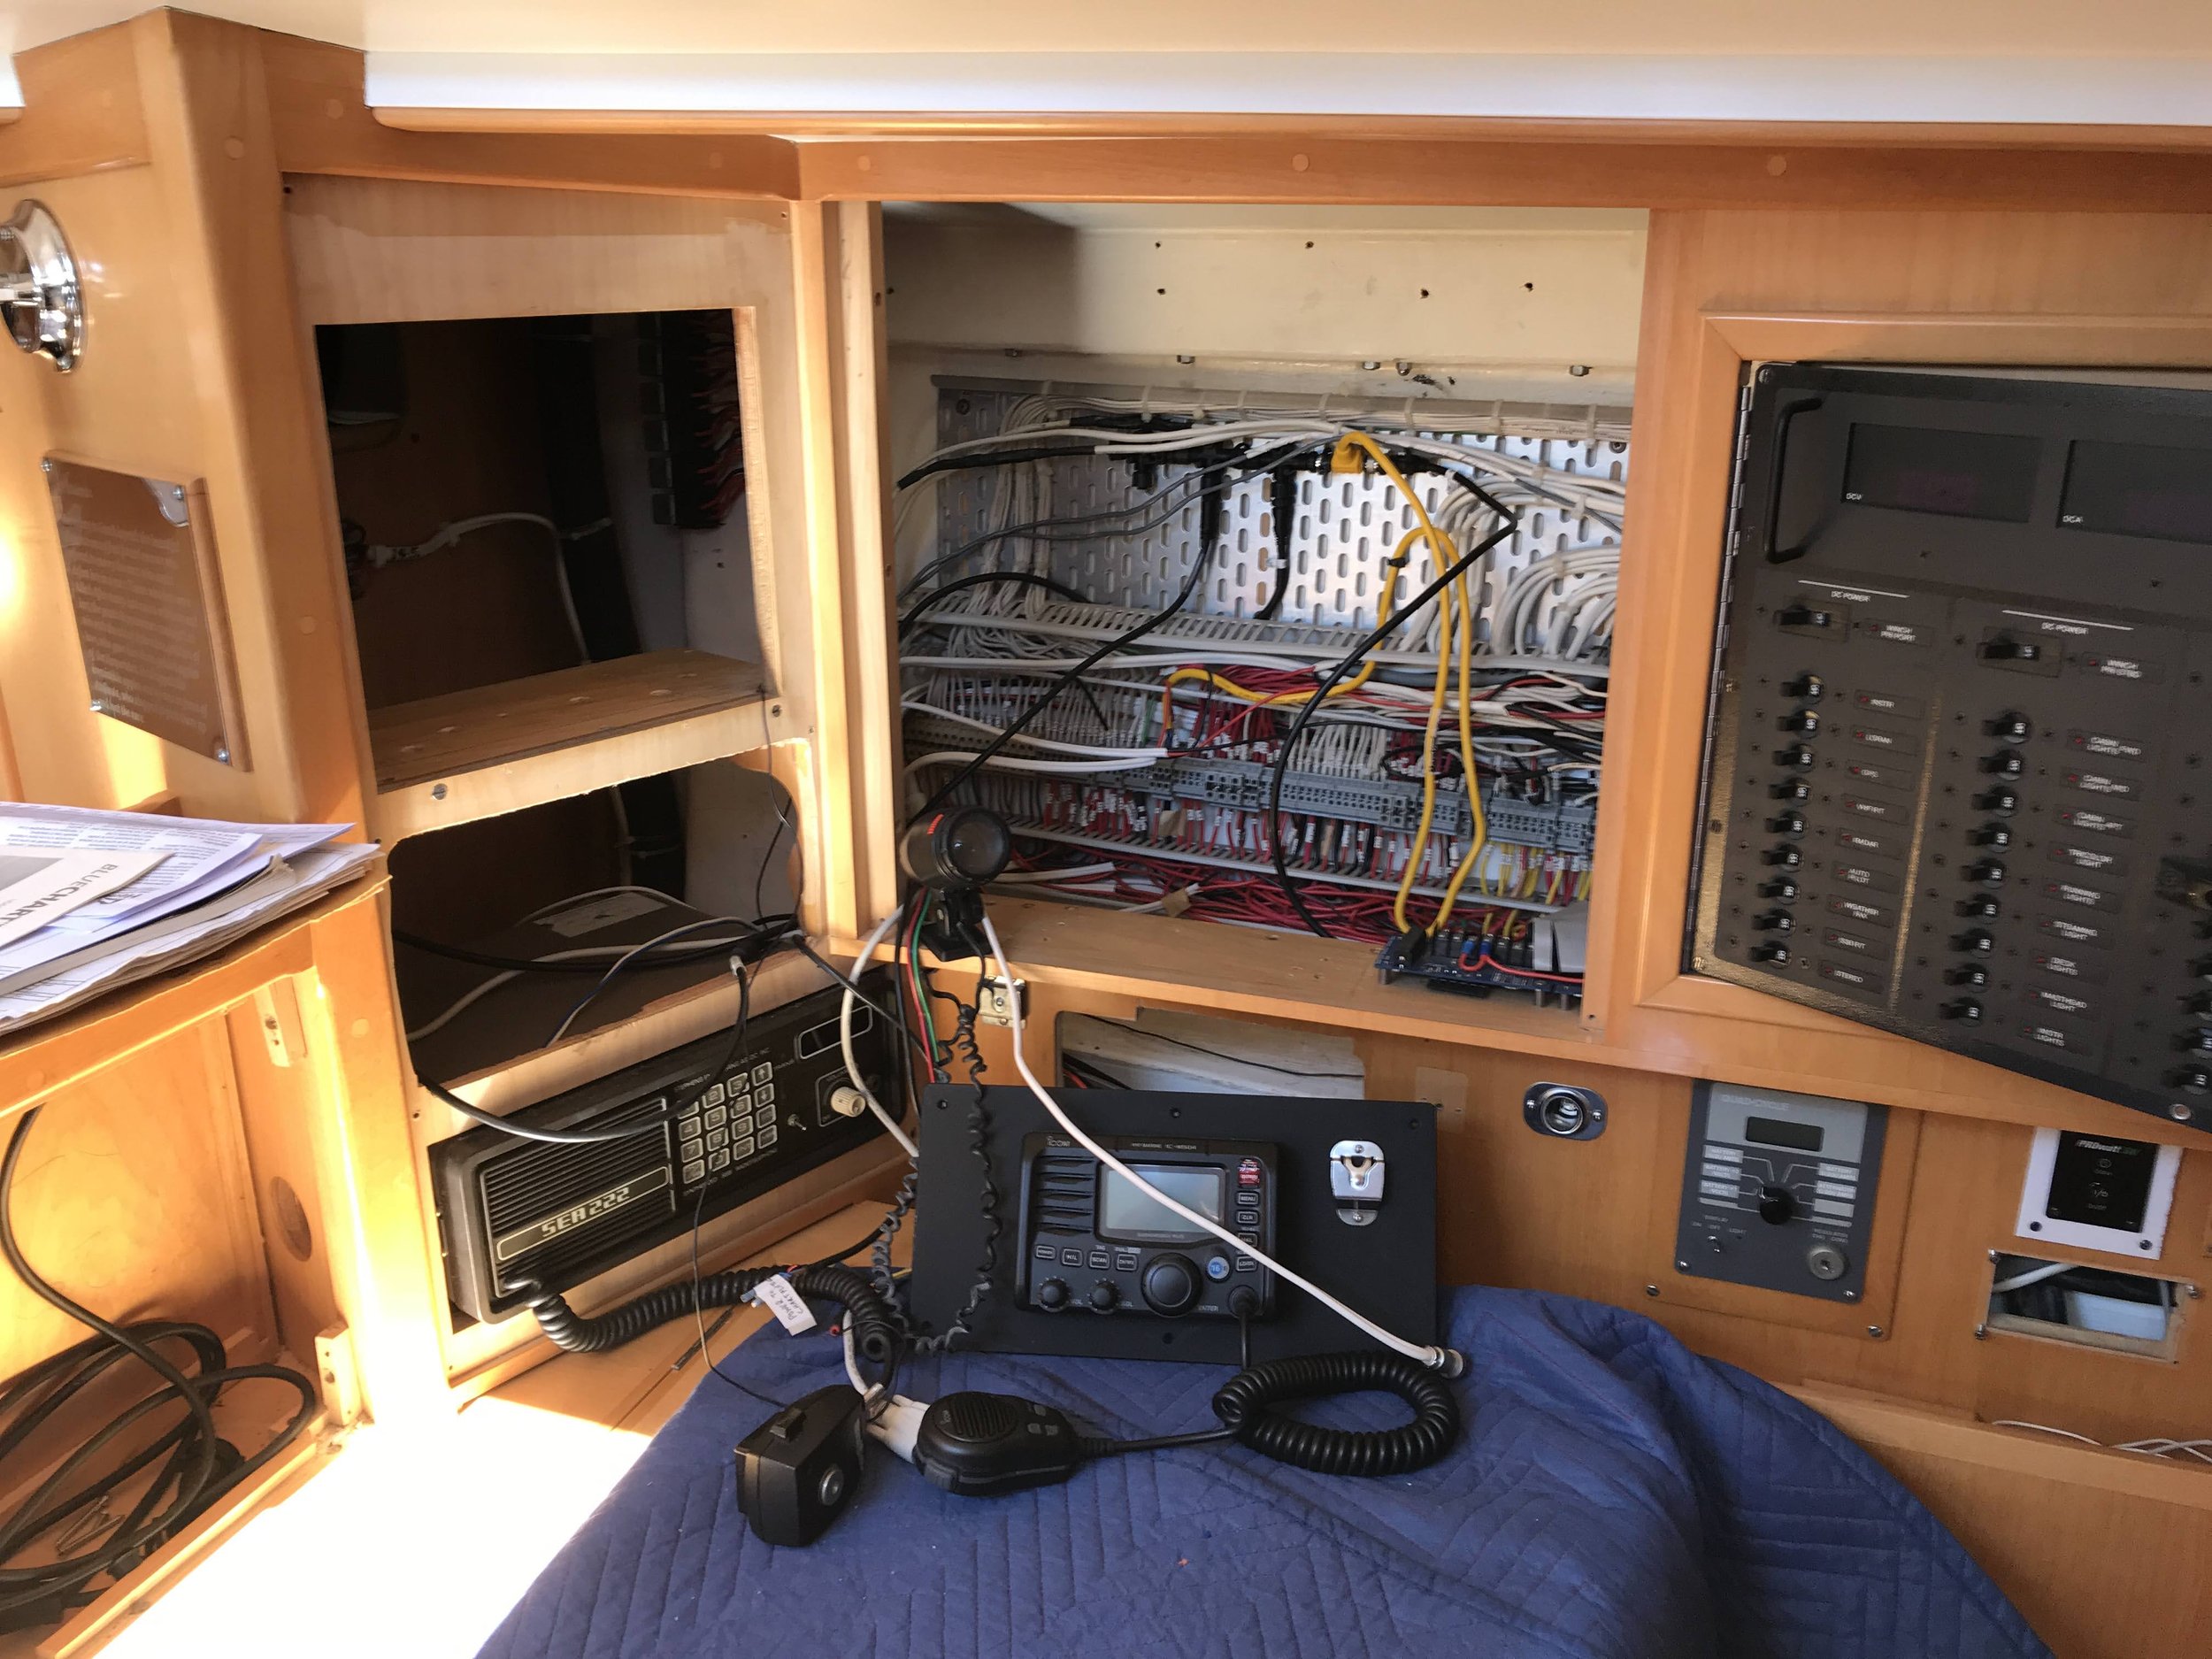
During: original SEA single sideband radio replaced by new Icom HF and VHF radios
Once the instrumentation was in place, GC’s master craftsman Denis Fraisse built backing plates and a custom door in the nav station where an old weather fax had been removed to allow us access to the wifi router, AIS module, and Bluetooth functions. Because so much of the electronics became consolidated onto the network, there were now large empty spaces in the nav station, which Denis artfully repurposed into storage nooks and cubbies. The black backing plates gave the space a modern feel.

After: modern navigation station
The boat’s original C. Plath compass needed a new diaphragm and seals, a project I did myself after a good deal of research. The folks at Weems and Plath were very helpful in getting me the replacement parts I needed and then I was faced with the task of getting the compass oil in without a bubble in the glass. After many hours, I mastered the technique, put everything back together and ultimately saved myself the expense of buying a new compass or having this one rebuilt by the factory. We took the small victories where we could get them.
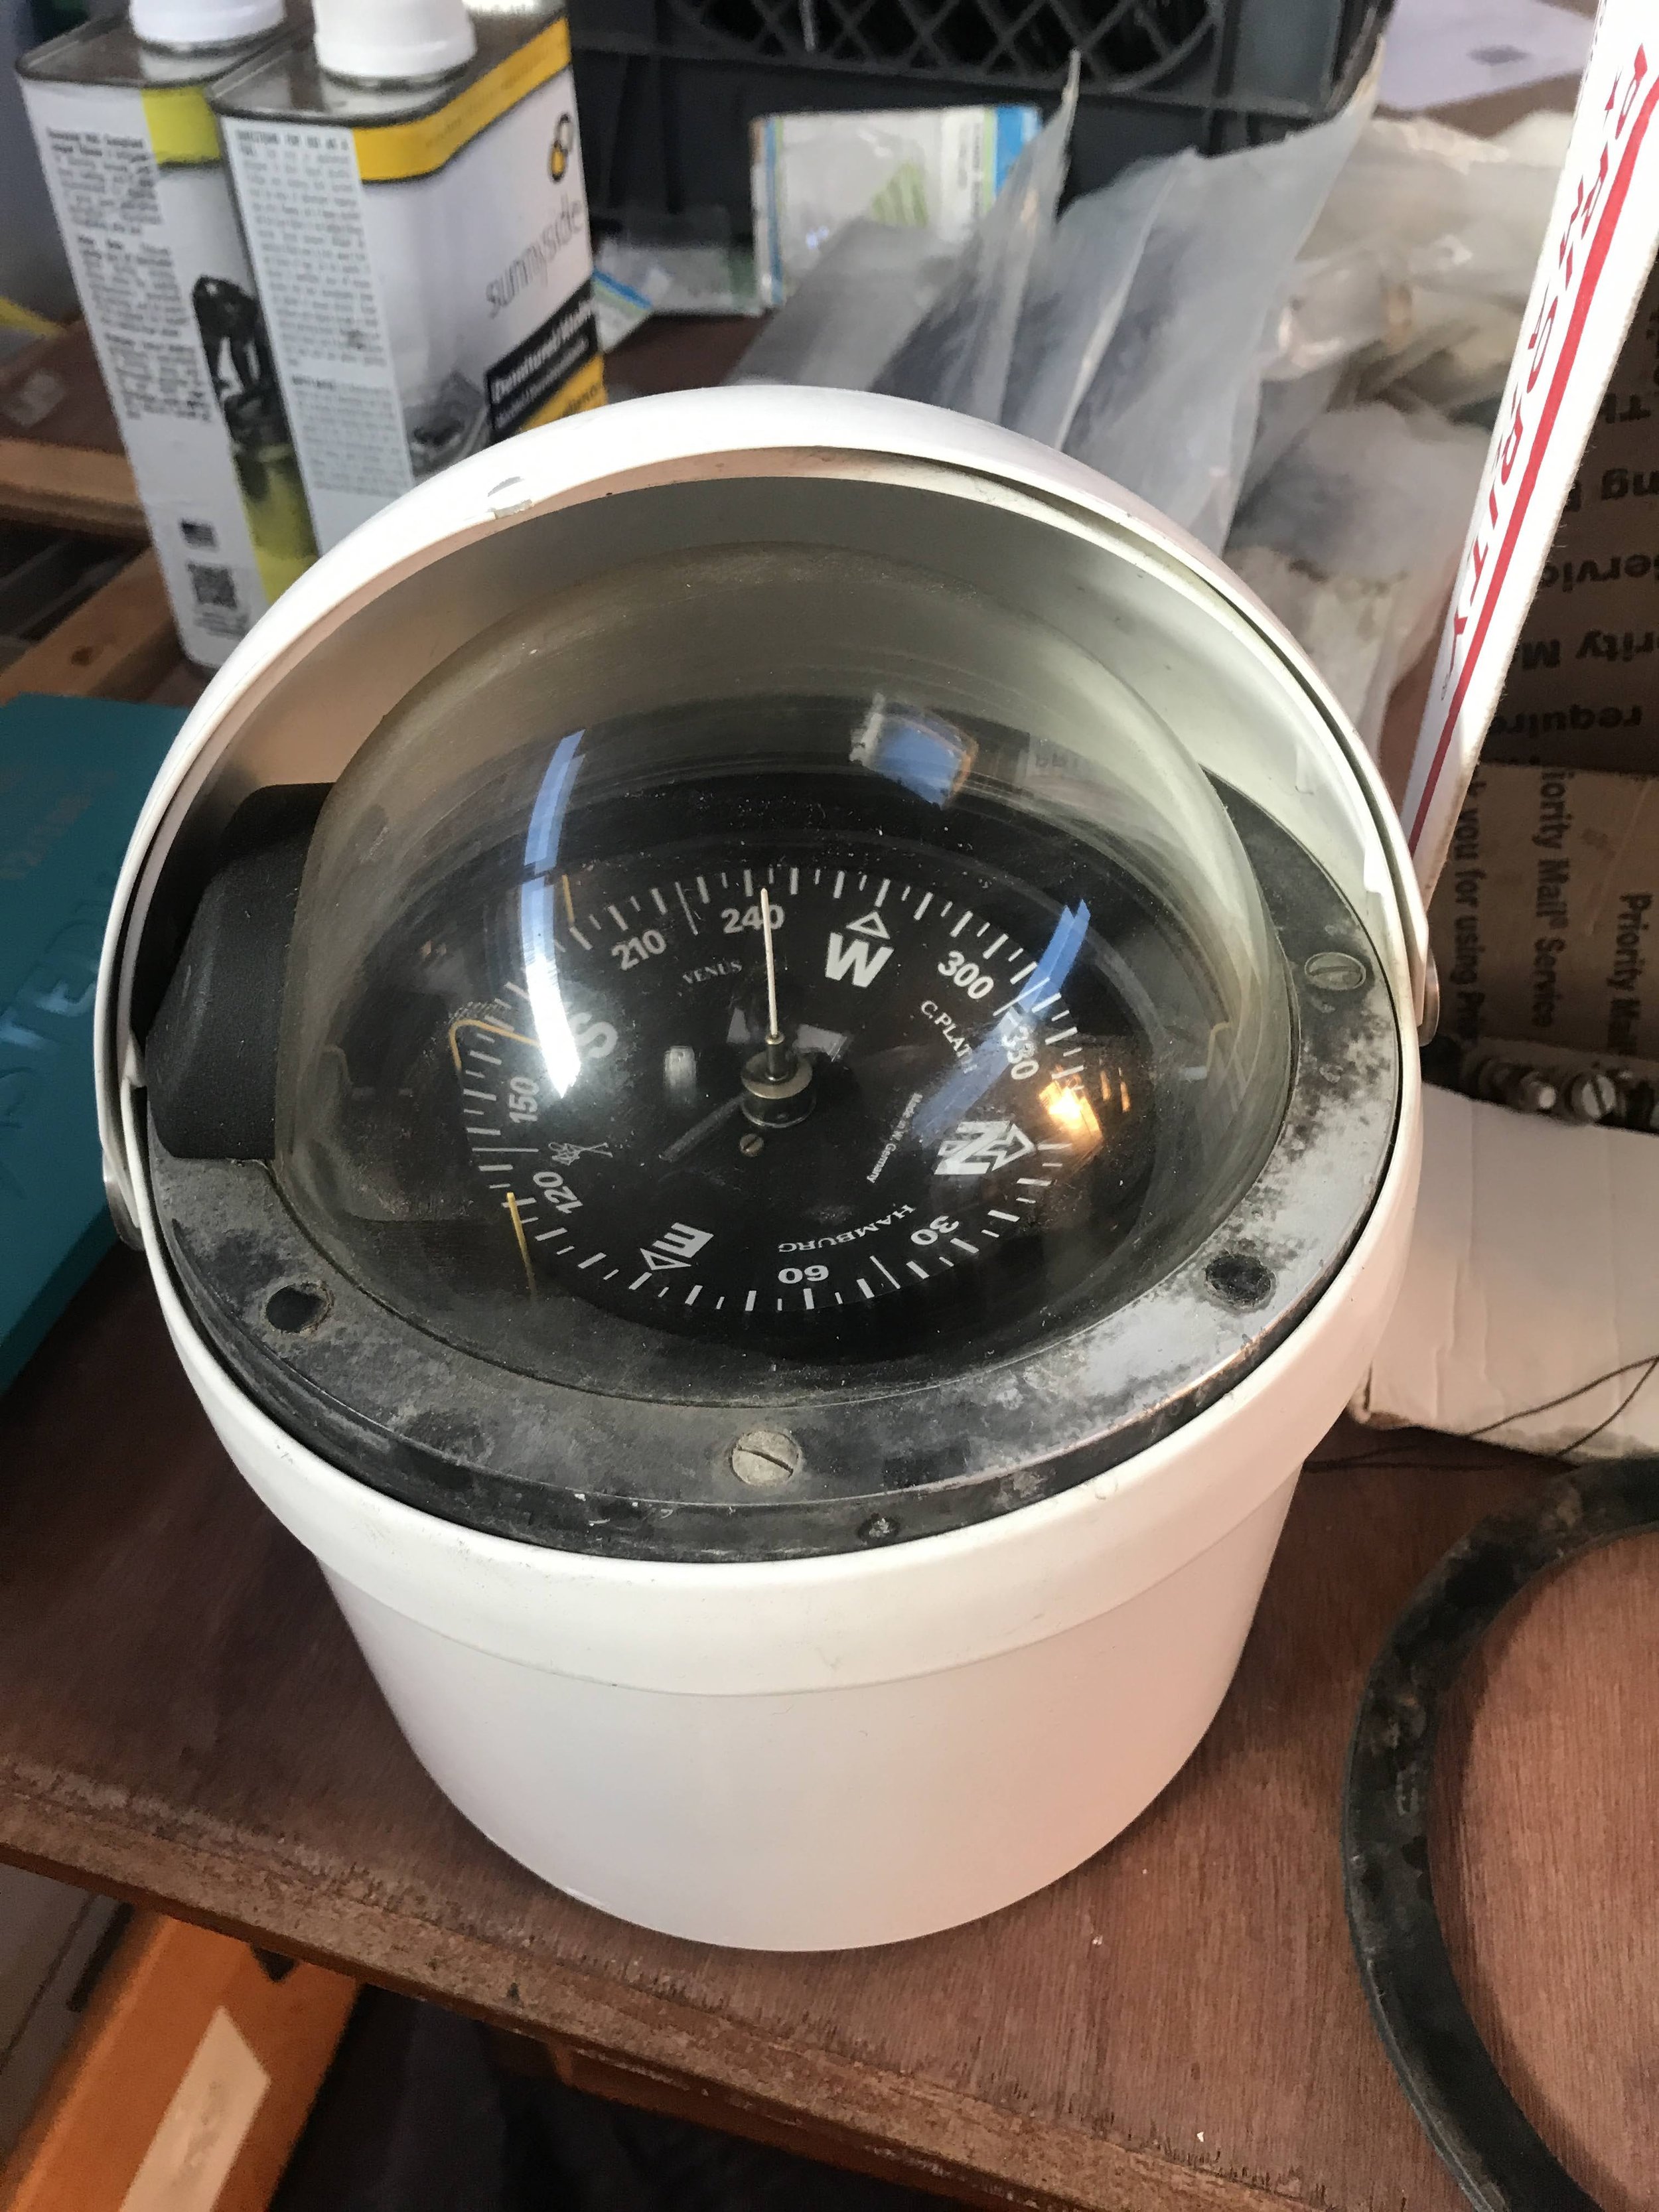
Before: all worn out with broken diaphragm

After: all fixed up with new parts, paint and oil
Another savings came from cleaning, polishing and repainting the original cowl vents for the dorades instead of replacing them.
Restored cowl vents for the dorade ventilation boxes

Restored compass, new remote VHF and B&G Zeus multi-function display at the helm
As the electronics were getting wrapped up, we also decided to revamp to the electrical systems on board, adding a new Mastervolt inverter/charger, a 250-amp alternator, a 900-amp hour battery bank and an EZ-5 battery management system. Electrical guru David Smith took on this project and sifted through years worth of outdated and inoperative systems. Bringing the electrical systems up to modern standard was a major undertaking and expense, but it was something we decided was part of the boat’s critical infrastructure and not a place we wanted to cut corners.

We opted for heavier batteries versus lithium to save costs

900 amp hours of house bank swallowed easily in the bilge
Next month in Part 3, we tackle the biggest job yet: a frozen rudder bearing. We replace deck hardware, rebuild the anchor locker, and attend to a variety of smaller projects before having the opportunity to sail her for the first time - and what a delight it was!